How to record with a video crew/in the studio
What do you need to record a knowledge clip in the studio? You can find below a checklist of the materials you need to bring to a studio recording. Keep in mind that this checklist depends on the kind of video you want to record. Always discuss the specifics for producing such a video with your video team! It is also essential to communicate your ideas and needs during the video recording process and post-production and make sure the resulting video is what you envisioned. If you want to know what the workflow is at your faculty, or if you have any other questions ask your video coordinator.
Studio recording with a PowerPoint
When recording in the studio with a PowerPoint you’ll click through your PowerPoint presentation yourself during the shoot. This way you can achieve the right timing, just as you rehearsed at home. In post-production the PowerPoint will be combined with the talking head shot, so it will serve as the background of the video.
Checklist
- Autocue text
- PowerPoint
Studio recording without a PowerPoint
If you don’t use a PowerPoint during the studio recording, the editor will combine the talking head shot with the visuals from the script in post-production. Therefore it is important to clearly communicate the preferred timing of visuals in the script.
Checklist
- 3-column script
Depending on the faculty you are working with, the workflow can be slightly different from the steps described above. It is possible to work with a PowerPoint, but it is also possible to combine the talking head with selected visuals in the post production phase. In all cases it is best to contact the video coordinator at your faculty before you start.
- Think of how you want people to perceive you. What is the impression you want to give?
- Patterns are a No No. Checked, tartan, fine pinstripes, sweaters and all other fancy patterns do not work particularly well in a studio as the pattern begins to flicker on camera and becomes very distracting. Wear solids.
- If possible, avoid pure white or black. Go with neutral colours or pastels. The camera will boost the contrast. White on television can blind the viewer. Black and navy will look as dark as midnight. Stick to more muted colours.
- Make sure your clothes are comfortable. Don't pick a suit you hate because you think it looks better. If you're uncomfortable, it'll show in your face and body.
- Avoid flashy or dangly jewelry. Some jewelry can be worn, but the lighting might reflect off silver and gold jewelry. This can be quite distracting for the viewer.
- If you wear contacts or glasses, stick with contacts. You might be able to work around glasses, but if you wear glasses and have contact lenses we would advise you to wear the latter.
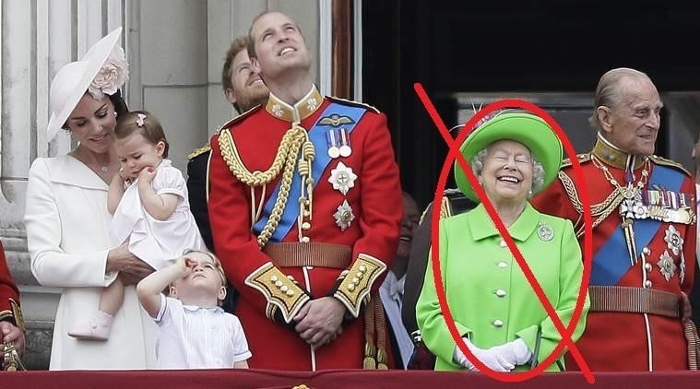
- Avoid wearing green. Especially when you present in front of a green screen. A green screen will allow to insert any background - so it is very important not to wear any green yourself.

For both single videos and series, it is important to keep continuity in mind. This means that if you are doing a shoot over the span of several days:
- Make sure your clothes stay the same (if you are producing an online course you can choose to change your clothes for example for every module).
- Your haircut/ model stays the same.
- If you are doing a shoot on location and there are decorative objects, make sure they stay in the same spot (for example books on a table).
An autocue or teleprompter is a display placed in front of the lens of the camera, where your rolling script text can be displayed. This way you can read your text out loud while looking straight into the camera. The speed can be adapted to your speaking pace. We normally speak at a pace of ca. 110 - 130 words per minute. You can practise reading your scriptlectures by using Cue Prompter.

